
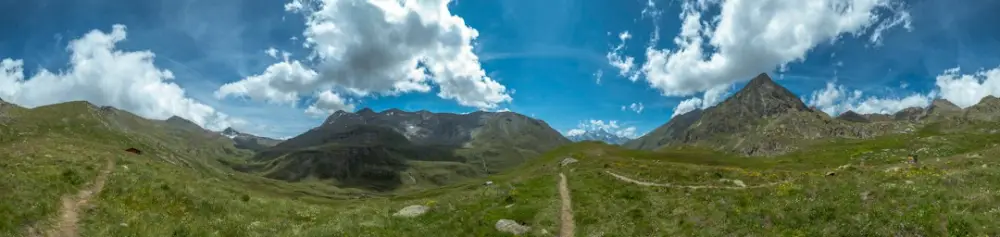
Exposure blending and panorama seams are critical components of digital photography. Blending merges images with different brightness levels into a single, cohesive frame, while seam management ensures the boundaries between individual photos remain invisible. This process, often handled by automatic photo stitching software, creates professional, high-quality panoramic views without jarring transitions or exposure mismatches.
Capturing wide vistas often involves drastic lighting shifts, such as moving from a bright sky to deep shadows under a bridge. Without proper exposure blending, the final panorama resembles a patchwork of mismatched squares. Effective blending reconciles these differences by creating smooth gradients, ensuring that the transitions feel natural and the overall composition appears professional to…
How Automation Removes Visible Seams
The primary challenge in any multi-shot project is the seam—the exact line where one image ends and the next begins. Even with a tripod, slight movements or changes in lens vignetting can make these lines obvious. Modern tools use advanced algorithms to find the "optimal seam," a path through the overlapping area that minimizes the difference between the two images. By avoiding high-contrast objects or moving subjects, the software hides the transition in areas of low detail, such as a clear blue sky or a gravel path.
Vignetting is a common culprit for visible seams. Most lenses are slightly darker at the corners than in the center. When you overlap two photos, the dark edge of the first photo sits against the bright center of the second. An effortless panorama maker for photography and design uses gain compensation to level out these brightness drops. This process involves measuring the light fall-off of the lens and applying a mathematical correction to brighten the edges before the final merge takes place.
Consider a forest scene where thousands of leaves overlap. If the software simply cut a straight line, it would likely bisect dozens of leaves, creating a jarring visual break. Instead, automated seam finding snakes around the edges of the leaves, following the natural contours of the image. This "intelligent cutting" is what allows a series of handheld snapshots to look like a single, high-resolution capture from a wide-angle lens.
Image Morphing and Blending Roles
Stitching is not just about laying photos side-by-side; it involves significant geometric transformation. Because cameras project a 3D world onto a 2D sensor, images taken at different angles have different perspectives. To make them fit together, the software must perform image morphing—stretching and warping the pixels so that features like straight lines and horizons align perfectly across the entire span.
This morphing often utilizes cylindrical or spherical projections. In an architectural setting, where straight lines are paramount, morphing prevents the "bowing" effect often seen in wide-angle photography. However, warping the geometry can introduce alignment errors if the camera was not rotated around its nodal point. This is where a parallax and stitching error correction guide becomes essential, as it helps users understand how to minimize these physical errors before the software even begins its work.
Multi-band blending is the gold standard for handling these morphed images. Instead of a simple fade between photos, the software breaks the image into different frequency bands. It blends low-frequency information, like large-scale color and brightness, over a wide area to ensure consistency. Simultaneously, it blends high-frequency information, like sharp details and textures, over a much narrower area to maintain crispness. This dual-layered approach prevents the "ghosting" or blurring often associated with simpler blending methods.
Moving from Manual to Automatic Stitching
In the early days of digital imaging, photographers had to manually mask layers in complex editing software to hide seams. This involved painstakingly painting gradients and adjusting color balances for every single frame. Today, the transition to automatic stitching has turned a multi-hour task into one that takes seconds. Automation handles the heavy lifting of feature detection, where the software identifies unique points in each photo to use as anchors for alignment.
Take, for example, a real estate photographer capturing a small bathroom. Space is tight, and the light from a window might blow out one side of the room while the vanity remains in shadow. Manual stitching in such a cramped environment is a nightmare due to perspective distortion. Automatic algorithms can detect the lines of the tile and the frame of the mirror, warping the images to fit the tight geometry while simultaneously balancing the exposure of the window light against the interior lamps.
The move toward automation doesn't just save time; it increases accuracy. Algorithms can compare thousands of points of interest across a dozen photos far more precisely than a human eye. This precision is what allows for the creation of gigapixel panoramas—images so large and detailed that you can zoom in from a city-wide view to see the text on a street sign blocks away. These projects rely entirely on the software's ability to manage hundreds of seams without a single visible error.
First steps for mastering seamless panoramas
To achieve professional results when merging multiple frames, you must prioritize consistency during capture and precision during processing. Follow these actions to ensure your final image is free of artifacts:
- Start by locking your camera's exposure, white balance, and focus to ensure every frame has identical base properties.
- The first step in post-processing is to import your RAW files into a tool that supports automated gain compensation to neutralize vignetting.
- To begin the alignment, verify that the software has correctly identified control points in overlapping regions to prevent geometric missteps.
- Next, activate multi-band blending to smoothly transition color and brightness across the frame without losing fine texture.
- Finally, review the generated seam paths to ensure the software hasn't bisected high-contrast objects or moving subjects.
Showcase: Pittsburgh and Beyond
Pittsburgh provides an excellent case study for the power of exposure blending. The city is famous for its "Golden Triangle," where the Allegheny and Monongahela rivers meet to form the Ohio River. A panoramic view from Mount Washington captures the dense skyline, the yellow steel of the bridges, and the reflective surface of the water. Each of these elements presents a different challenge: the sun reflecting off the glass skyscrapers, the dark shadows under the bridge trusses, and the moving ripples on the river.
When stitching a Pittsburgh panorama, the software must handle the repeating patterns of the bridge suspension cables. A slight misalignment would create a "double bridge" effect. By using robust seam finding, the software identifies the structural lines and ensures they remain continuous. The exposure blending then ensures that the deep blue of the rivers matches across the five or six frames required to capture the full confluence. This results in a professional-grade image that looks as though it were taken with a specialized panoramic camera rather than a standard smartphone or DSLR.
For those looking to turn their own photos into similar visual stories, understanding these mechanics is the first step toward better results. By letting the software handle the complex math of exposure blending and seam management, you can focus on the composition and the moment. At Auto Stitch, we believe that advanced photography should be accessible to everyone, providing the tools to transform a series of simple snapshots into a seamless, professional-quality panorama that captures the full scale of your experience.